|
Facebook has free tool for you to market your business or organization through their social media platform. You have to have a Facebook account to use this tool. Facebook pages are a great way to direct people to a location to check for hours, see reviews and more. This page will function as a digital storefront for others to discover your business or organization. I’m ready and think Facebook pages are a great idea for my business or organization! Please read the following and consider these points before we jump in: While it is great that this tool exists and is free to use, I highly encourage you to think about why you want to have a Facebook page, who your audience is and what you are going to share. Knowing your mission, vision and purpose behind all the tools you use and how they fit into your organization or businesses’ overall plan is important to consider when adding something else to manage.
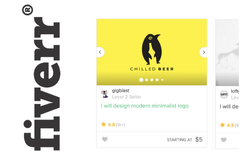
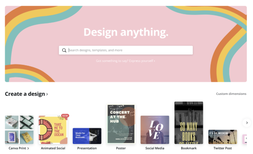
If the answers are yes and you think this tool is right for you: let’s do this! I suggest creating your page on a desktop computer. It is possible to do this on mobile, however you have more control and can navigate the setup easier. 1. On the left hand side of your screen, find the explore header. Under the explore header click on “Pages.” 2. You will be directed to a screen with suggestions of pages to follow. On the top of your screen underneath the toolbar click the green “Create Page” button. Facebook will begin to prompt you with the following to start setting up your page. 3. Choose what type of category fits your business or organization. This will help others discover your page via Facebook’s explore pages feature. 4. Pick a page name (usually your business or organization’s name) and pick a category that best describes your organization or businesses services or products. 5. Facebook will prompt you to upload a profile picture and then a cover photo. Facebook profile photo dimensions are 180 X 180 pixels. Facebook cover photo dimensions are 820 X 312 px. Let’s talk branding real quick. As a business and an organization you probably have a logo and a general set of colors that you feel describe your look and feel visually. Using your logo and your colors of choice help establish a consistent image that audience members can associate with your message and eventually be able to recognize you. If you don’t have a logo or branding colors set yet, here are some tools to help you lock down imagery and colors that are unique to you and what you have to offer. Establishing this look now while you launch your page will help your audience connect to you!  Fiverr.com is an affordable website that has freelance graphic design services and more. Visit the site and choose a designer by looking at previous work they have created. Make sure you are able to provide detailed descriptions and examples of what imagery you prefer in a design. The designer will work with you to produce a logo and you can pay for a number of additional revisions to polish your look.  Canva has free templates for logos and elements to create your own. This free option allows you to plug items in and have a design to use instantly. They also have ready made templates for Facebook cover photos and profile images to use quickly. All the graphics made here are from Canva. If you already had a logo, but don’t have a color scheme that matches your business or organization. Check out this link that Canva shared on popular color schemes. I personally love to look at all these potential color coordinations and options. 6. The shell of your page is there! Awesome job. This is a huge step. Peak around at the options and tips that Facebook gives and learn to navigate your page. Now begins the fun part of filling information in. 7. On the left hand side click the see more drop down arrow. Click the about section. This section is the most important to your audience in finding out more about who you are, what you do and how to contact you for more information. Having your mission, vision and descriptions of what you do documented will help you fill out this information easily. 8. This next step is up to you what you want to do first. If you have content or items that you would like to post prior to inviting friends or others to view the page, please upload those things ahead of time. Preparing examples of your work to backlog your page is a great way to direct people to a new page. I uploaded a couple of key examples of services that I offer so that once people got to my page and found me they had a couple of posts to look at.
9. Share your page with others. Facebook gives four weeks of education pointers as you start your page. The above screenshot is some of the education they provide in the first week on how to get others to like your page. On the right hand side of your page there is a tool bar that says “Know friends who might like your page?” accompanied probably by names of people that are your friends. Click the invite button to invite your friends or share your new page to your personal timeline with a note on how others can like your page. If you already have clients, volunteers or others who support you, ask them to recommend your page or to leave a review. Word of mouth and having others advocate for you is one of the best ways for others to hear about the good work you are doing. Back to Facebook’s Page Education: Facebook gives the admin a special view on the page for four weeks of education as you continue to update your page. The four themes that Facebook helps provide tools for you as a new page owner admin are as follows. Week 1: Start Growing Your Audience Week 2: Create Engaging Posts Week 3: Get the Most of Your Business Page Week 4: Customize Your Page 10. Continue to Produce Content and Talk to Your New Audience. Now that you have a place to share information and to direct people to, make sure you have a plan of what information and when are you going to share it. For businesses and organizations, the recommendation of proportions of content that is engaging and building awareness with your audience (blog posts, website updates, general awareness) versus content that is asking your audience for something (book your services, buy a product, make a gift, etc) should be 80/20. A great item that I like to utilize for myself when planning content are blank monthly calendars or weekly calendars to plot out ideas, topics or themes that I want to talk about during that month. When my ideas are plotted this way, I see what areas still need to be developed and what type of content is missing from my calendar to maintain that 80/20 suggestion when communicating to my audience. In my calendar I leave enough wiggle room to be able to share something noteworthy and exciting if something were to come up. For example: a launch of a friend’s business, a donor story that came together, or a new event that is planned in the community that supports my mission or vision. I also have a blank page in my moleskine notebook and a spreadsheet to keep content ideas so that when I need additional content I have a list to pull from and develop. Use tools such as Canva to plug information into social media template shells. Sometimes an idea will come to you when you are looking at templates that exist in their library. Again: Facebook pages are great tools to market your business or organization. Being able to maintain a consistent posting schedule and have information to share with your audience is crucial to using this platform in the way it was designed. Continue to ask yourself questions about how you plan to maintain this page, create engaging content and your ability to monitor your insights/audience comments.  These instructions and tips are meant to be thorough so that you can take this resource and run with it. That being said. I am happy to help you craft your story and launch your Facebook page. Fill out the contact information on my website helenbrincefield.com so we can start planning. Looking forward to helping you share your story for your business or organization!
0 Comments
Leave a Reply. |


